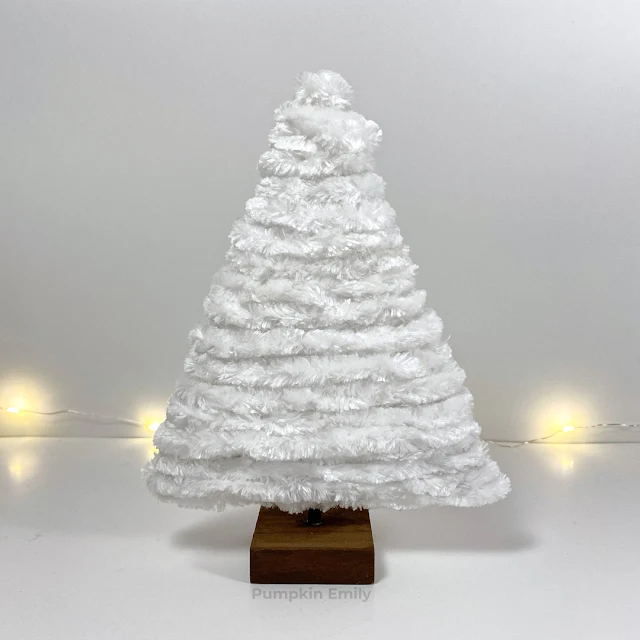
Hello there! I saw some different versions of some tree decorations on the internet and I decided to make my very own tree with yarn, wooden dowel, wood block, and cardboard. I'll also be showing you how to make one too!
It was actually really simple to make and depending on the yarn or other things you use it will look unique.
If you would like to learn how to make your own yarn tree, you can watch the video below or you can read on. The DIY starts at 4:37.
What you're going to need:
Yarn
Cardboard
Hot glue
Scissors
Wood block
Wooden dowel
Pencil
Ruler
1. The first thing you want to do is that you want to make a base for your tree and you want to start by putting hot glue on the end of a wooden dowel.
2. Then you want to place it on a wood block or you can use something else for the base of your tree.

3. Now when the glue is completely dry, you can mix acrylic paint with water and then you want to paint what you just glued together. The reasoning on mixing the paint with water is because you may be able to see the wood underneath of the paint.


7. Then you can flip to the front and glue more yarn on the bottom of the tree.


11. Now if you have any spots that you missed, you can just cut some extra piece of yarn and glue them on top of any place that you missed. Just make sure you keep the ends of each piece of yarn you glue down on the back so you don't see them on the front.
12. Once you like how your tree looks, you can trim any of the extra yarn you just glued off of the back and then you're done.

Here's how my tree came out!
I decided to keep it how it is but if you would like you can add gems, a star, or you can add a string of beads to act like ornaments.

My yarn tree came out looking really cute and I love the yarn I chose. It makes it look really fluffy.
If I were to make another one I may try to get green fluffy yarn and add a string of beads to it.
What do you think about this yarn tree and will you be making one? How would you design yours?


2 comments
It's so lovely! Also that kind of yarn is really pretty, hope to find one in my local craft store!
ReplyDeleteThank you! I do agree with you. The yarn is pretty. :)
DeleteHello! Thanks for your comment! I love to read your comments and I hope you enjoyed reading this post. Make sure to come back to see if I replied back and for new posts. If your comment is spam I'll most likely delete it.